In previous posts, We have Installed Flex OS in here, and finished our initial configuration in last post. Now we will walk through the creation of Master and Media instance in our Flex.
We have already uploaded the application repository to our Flex, (Netbackup 9.1), and created the tenant and network bond as well.
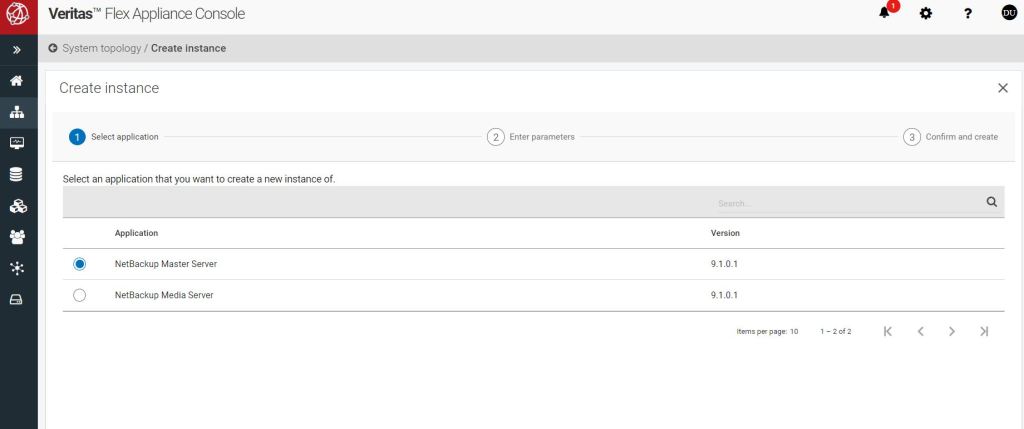
First step, we will access the Flex Web administration console (user:admin), from left menu, choose topology , since there is no instance created yet, we will select, “create master server” and press next in the bottom of page
In the next page, we will fill the required information and provide the tenant and network bond which was configured in our last post.Netbackup catalog size needs to be provided, as well as the Veritas customer JSON file and product key for Netbackup.
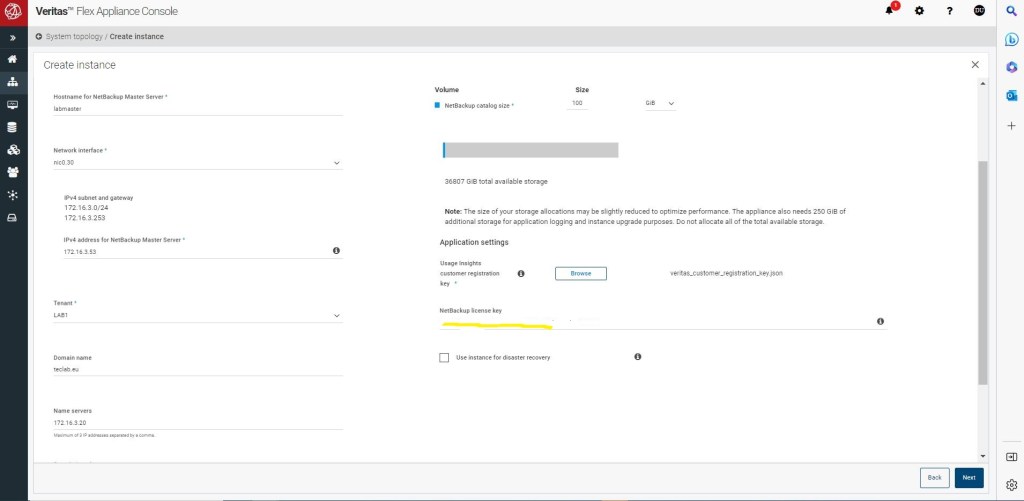
Once we will all the information, we will click on next in the bottom of the page.
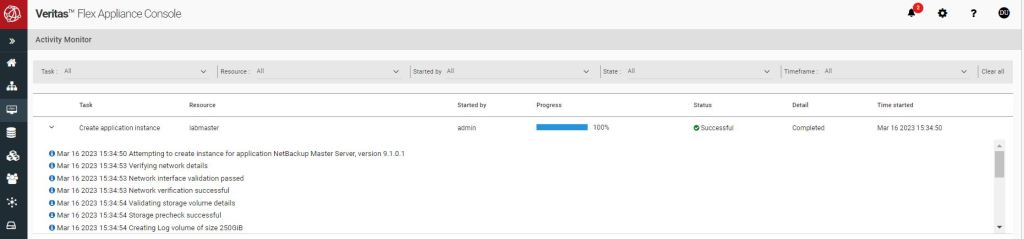
At the review page we will confirm and create the instance, it will take less than 10 minutes to create the instance,we can monitor the creation task under activity tab.
Once the master server is created, we will need to log in to the master server (via CLI) and the default credential ,username:appadmin, password:P@ssw0rd, as a security best practice will be requested to be changed upon first login in CLI.
Now we can log in to our master server web UI.(https://masterserver/webui)
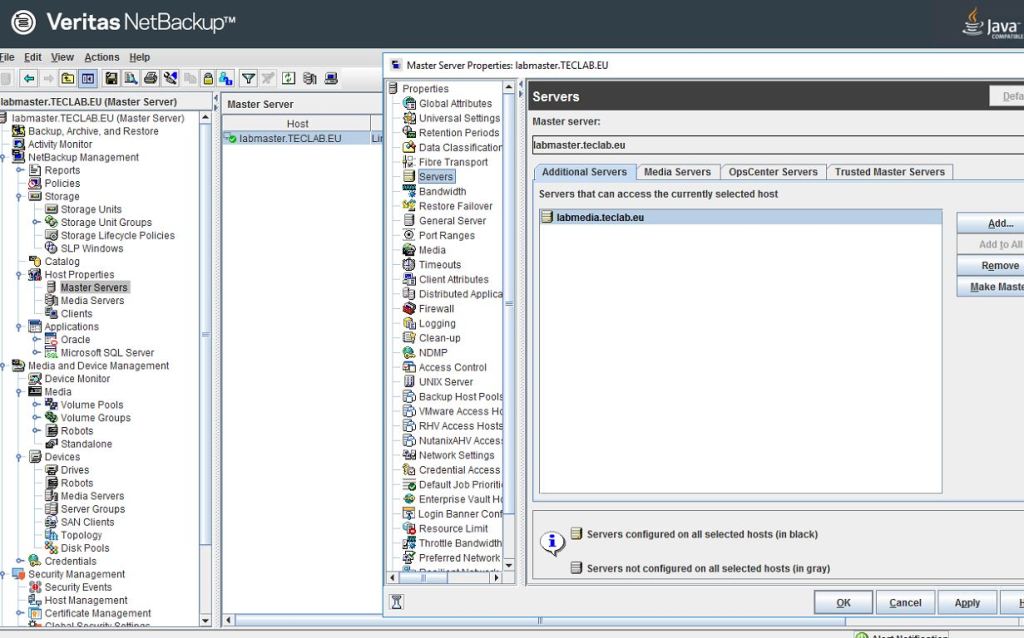
Unfortunately, in net backup 9.1, the host server properties is not added in web UI, so I have logged in to master server via a java console. First thing to do once you are in master server Java console, set the disaster recovery password.
Next, I will add the media server FQDN in Host properties of master server, in the Server properties, Under Additional servers and Media server , to support MSDP and Advanced disk.
This step must be done prior to installation of the media server, otherwise your media server will not be able to communicate with the master server properly.
Now that we have configured our Master server with the media server name, and have prepared the DNS for our media server, we will create the media server.
We will access the Flex Administration console, from left menu, Topology and this time we will select create media server instance.
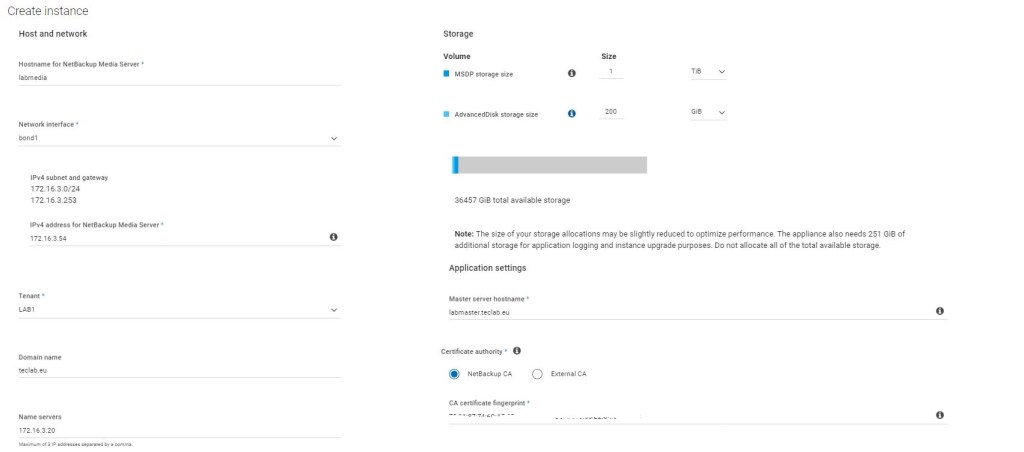
We will the requested information, on the right side, we will define size for our MSDP partition and Advanced disk (if needed), FQDN of our master server and provide the CA fingerprint, here we are using the Netbackup default CA, which can be retrieved from web UI or Netbackup java console, Security, Certificates, Certificate Authority
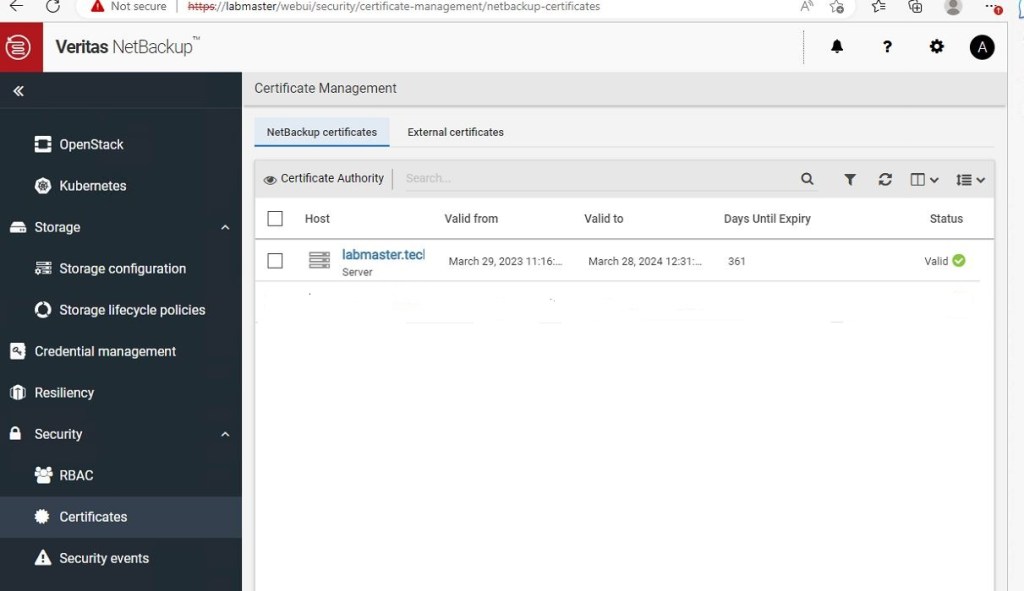
copy the Fingerprint SHA-1 or SHA- 256 based on your requirement and copy it to media server creation page.
, you will be asked for Netbackup product key and token, which is not mandatory but you can create a token from master server, under security, tokens.
Now that we have filled the needed information, press next and create.
Media server will be created in less than 10 minutes.
We will need to repeat the same procedure via CLI to change the default credentials (user:appadmin, password:P@ssw0rd)for media server as well.
As you can see, you can have your master and media server instances ready for production in less than 20 minutes, which saves you a lot of time & effort comparing to traditional way of Netbackup installation.
Ahmad,
