In our last post we have installed the FLEX OS on our appliance, and now we will do the configuration on Administration console.
Log in to flex Admin console, as admin and your credentials.
To begin we will create a tenant for our appliance, on the left menu , select tenant and fill the required information:

Next, we will create a network bond, in our lab environment, I have a flat switch, so I will not be able to use FC and will create a basic bond via Ethernet cable, from left, select, Network interfaces and select Network Interface(s) and select “create bond” from top menu.
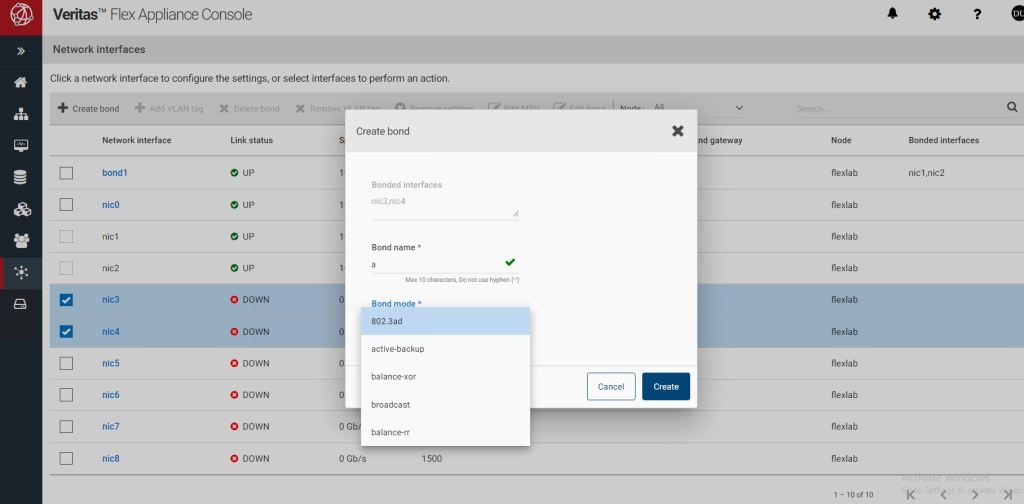
Based on your selection, in create Bond, you will need to choose one of the provided options. As I have a flat, switch, I have selected, two network interfaces, and “active-backup” as my bond type. For other bond modes and their configuration, you can refer to Veritas documentation in here.
To add instances, we will need to upload RPM files to flex appliance.
from left menu, select Repository and under Applications , select the RPM file you have downloaded from Veritas web site.

Flex will automatically create two applications, “Netbackup Master Server” and “NetBackup Media Server”.
Our initial configuration is done.in the next post, we will create our first instances, Master and media server.
