Whenever you receive a new Nutanix node, block, you need to install the Hypervisor and AOS on it .this usually happens through Nutanix Foundation.
In this post I will explain how to use Nutanix Foundation (portable) to install Hypervisor (AHV) and AOS on top of a node and then add a to an available cluster (expanding the cluster).
Requirement:
You will need the below information from the existing cluster(if you are trying to add nodes to it):
– AOS version,(download the same version from Nutanix website)
– hypervisor version (Download the same version from the vendor website)
-foundation version (just to be sure about compatibility)
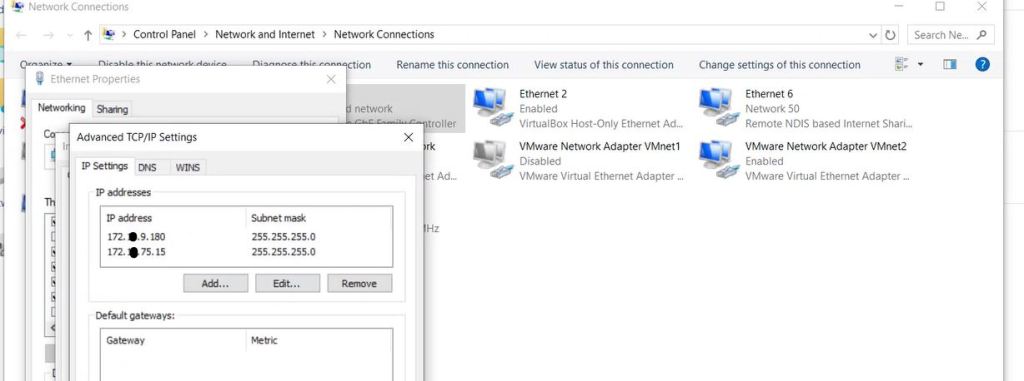
– Network bond (active-backup, balance-SLP, balance-TCP) and IP Addresses for new nodes (IPMI, Hypervisor,AOS) and possible VLAN.
The above requirements will make the cluster expansion easier as you will present a node to an existing cluster, which is on the same version of AOS, Hypervisor and network so there will be no pending job to be done at cluster level.
– download foundation tool:
I have used portable foundation, which is a software that gets installed on the PC
– a flat switch with enough ports and two cables for each node)
Since customer switch does not have IP broadcast enabled at production switch, I will use a flat switch (hub) to do the foundation of node(s).we need to connect each node’s IPMI (ILO, Idrac) and one data port to the flat switch and our laptop needs to be connected to the same switch as well.
Foundation of node(s):
Power-on the Node(s).If customer has different IP address for AOS/Hypervisor and IPMI, Since we are connecting two cables (one for IPMI and one for data cable,you need to assign one IP from each class to the Interface which is connected to Flat switch
Now it is time to start the Foundation, foundation portable will open in a browser automatically (https://localhost:8000)
you will be presented with a set of action which will help you to do a foundation for a node(s):
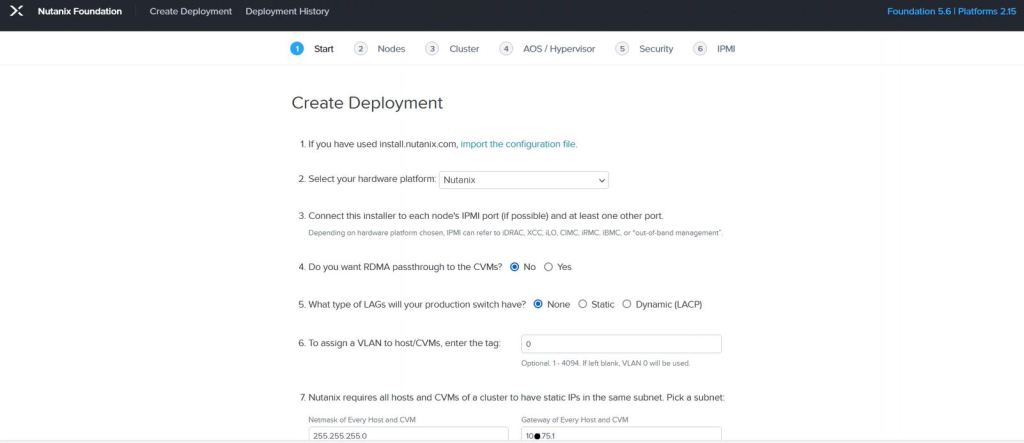

on the first page, of the foundation ,you need to provide the Gateway IP Address for Hypervisor/AOS and IPMI and their subnet.you will also need to answer a few questions.
As for the Network, I have already confirmed (customer available cluster) that they will be using balance-TCP,but here in foundation I will select active-backup and later on I will convert it to balance-TCP using command CLI.
Before you proceed to next screen, confirm that you have added the connected Interface(of your PC) to the list on the left side, otherwise do that and click on Next.
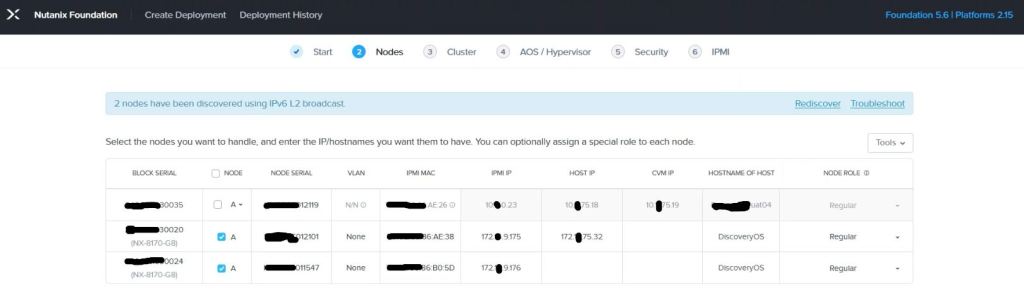
on Nodes, page, you will see the discovered nodes (if you do not see any nodes, click on Rediscover on top right)through IPV6 L2 broadcast.this will show you the Block Serial, Node Serial, IPMI MAC Address and you need to fill in the IP Address for IPMI,Host(hypervisor),CVM And host name, and also you need to choose the role of Node, (Regular, Compute or Storage).
Click Next and go to the cluster page
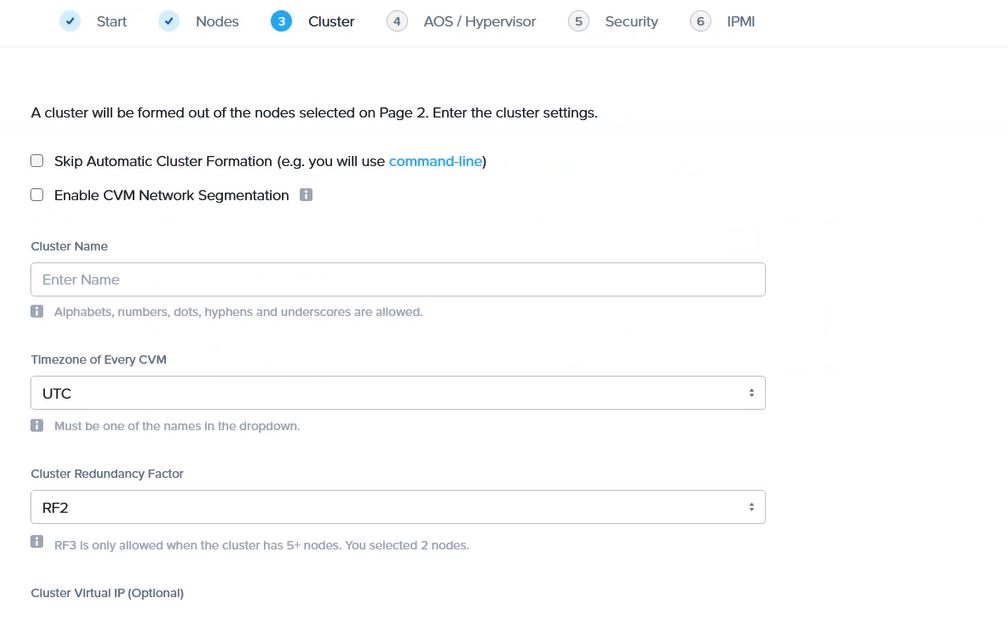
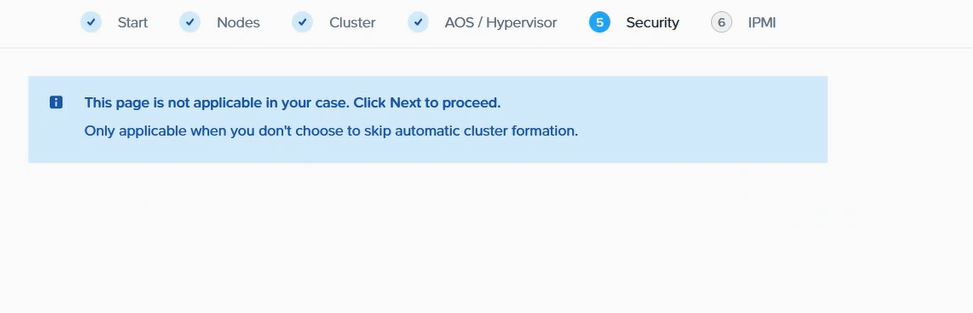
on cluster page, you will provide information which is needed for cluster,(NTP,DNS,cluster Redundancy, cluster Virtual IP and etc).since I am expanding a cluster , I will select “skip Automatic cluster Formation).you can do the cluster formation later on via command CLI as well.
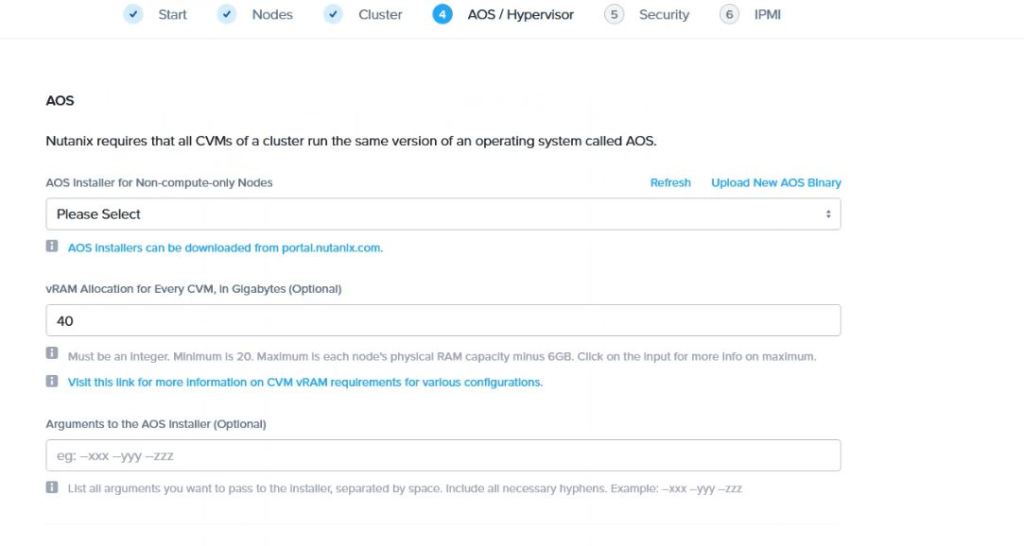
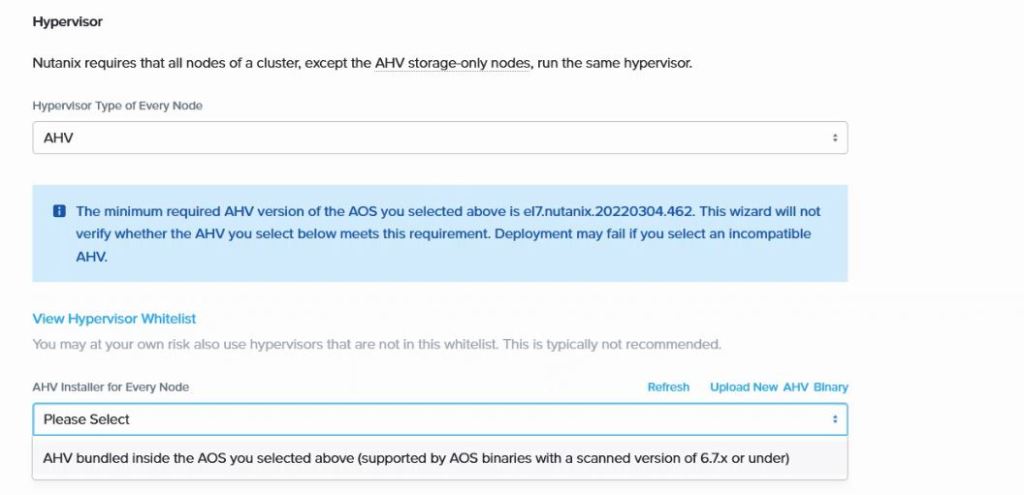
In AOS/Hypervisor , upload the downloaded AOS binary and select the RAM for the CVM (optional) then do the same for hypervisor as well.If you have AHV as hypervisor, the AOS package does have a version of AHV(install\AHV) so if your desired AHV version matches that version, there is no need to download AHV binary separately.
On security page since we have selected to skip the cluster foundation there is nothing to do.
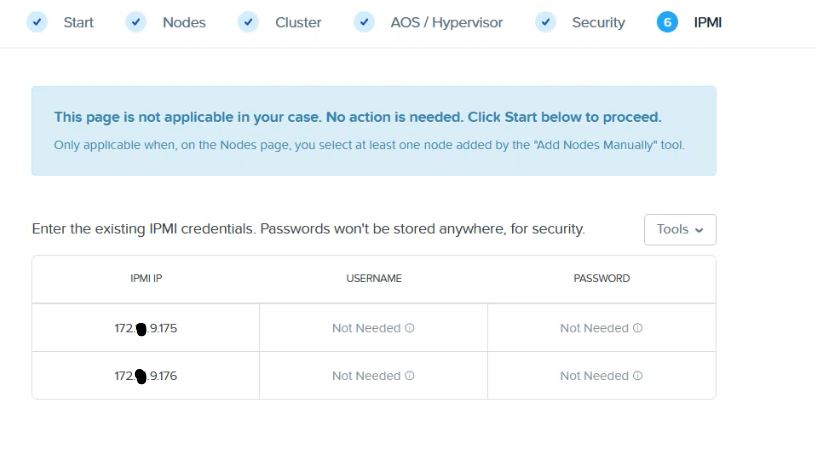
on IPMI page, we need to provide the Username and password for each node(s) which been added to nodes page manually.
Press start on the bottom of the page and the foundation will start.(you need to make sure that your PC does not sleep during the foundation).
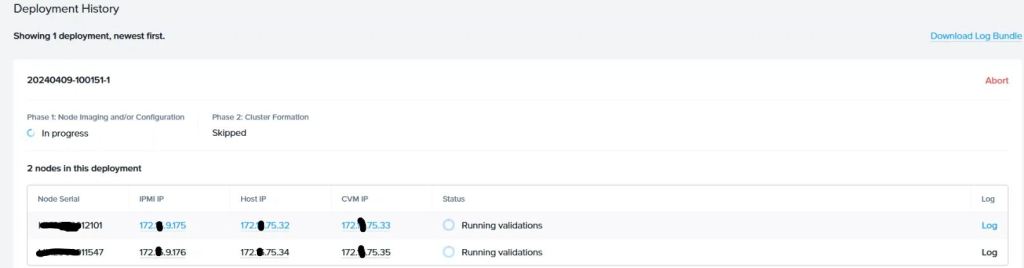
you can see the status of the foundation for each node from status or to find more details, you can open the Log (on the right side).
you can Abort the process at any moment as well.
It will usually take up to one hour for a foundation to complete.
once the foundation is finished, we will have nodes with hypervisor and CVM deployed on them.Now since I am going to expand an available cluster, We need to ensure the Network bond is same as cluster, so connect to each node,and use below commands:
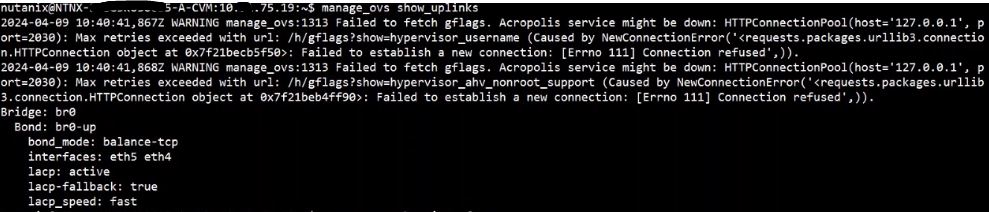
to show the uplinks available on the node:
#manage_ovs show_uplinks (you can add –bridge_name br0,but since it is a brand new node, there will be only one bridge which is br0)
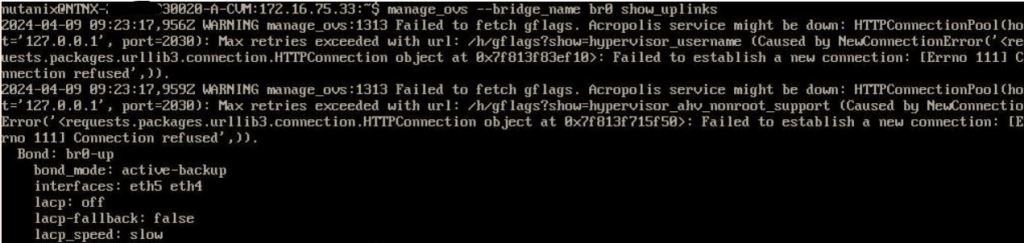
If your existing cluster has the same bond_mode, then there is no need to change but if you have other bond_mode you need to keep the bond mode on the new node same as existing cluster.for my case customer had LACP-TCP so I used below command to change it:#manage_ovs --bridge br0 --interfaces eth4,eth5 --bond_name br0-up --bond_mode balance-tcp --lacp_mode fast --lacp_fallback true update_uplinks
to explain above code:
–bridge br0 (is the name of the bridge)
— interfaces eth4,eth5 (name of interfaces (which will be used in the bond)
–bond_name br0-up (name of the bond, which we got from our previous command)
–bond_mode balance-TCP (name of the bond mode, active-backup, balance-TCP, balance-slb)
–lacp_mode fast (you have option of slow and fast, Nutanix recommends you use the fast)
–lacp_fallback true (will fall back to active-backup in case the LACP communication failed, this needs to be configured from TOR switch as well).
Now that we have configured our bond in the desired bond mode and configuration, there is one more pending task before we procedure with our cluster expansion.
We need to provide VLAN to our hypervisor and CVM, usually and as best practice you should keep the CVM And Hypervisor in the same VLAN.
for AHV,to find out what is the current VLAN, from CVM run below command:
CVM#ssh root@192.168.5.1 “ovs-vsctl list port br0” (
check the value in front of the tag if it is anything other than 0 that is your AHV VLAN to assign a VLAN to AHV
CVM#ssh root@192.168.5.1 “ovs-vsctl set port br0 tag=10” (assign vlan 10 to AHV)
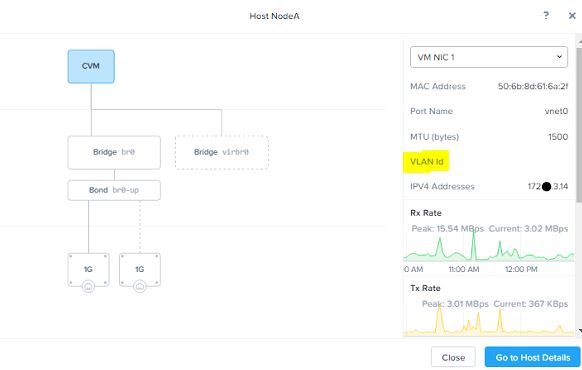
for CVM, to find out what is current VLAN, you can simple access the Settings,Network configuration, click on any host, select the CVM and on the right side you will find out the CVM VLAN
to change the CVM VLAN, from CVM,
CVM#change_cvm_vlan <vlan#>
CVM#change_cvm_vlan 10
We are done with our configuration, let us expand our cluster.
Connect the IPMI and data cables to your production switch, you should be able to ping your AHV, AOS and IPMI via network.if you are not able to reach them you need to do some troubleshooting.
once cables are connected to production and you are able to reach them, connect to the existing cluster, go to Settings>Expand cluster
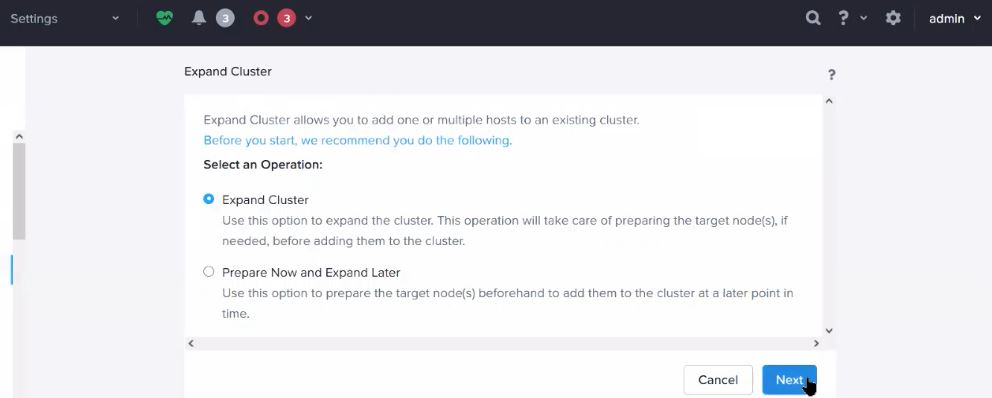
on the right side, select Expand Cluster and click on Next
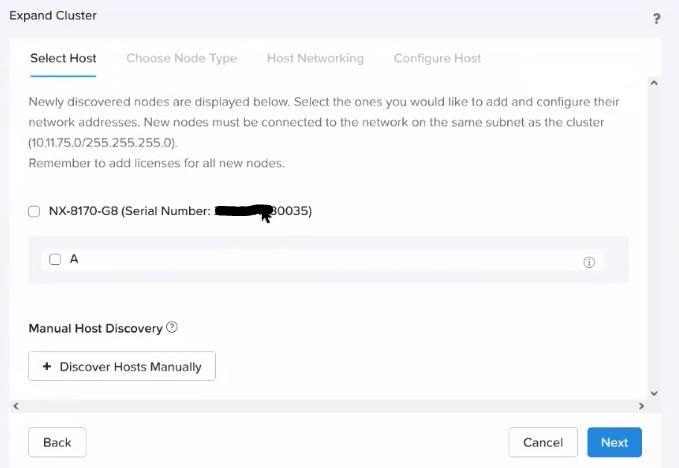
on the Select Host, select your Host(s) ,confirm the IP address of AHV,CVM and IP and click on Next
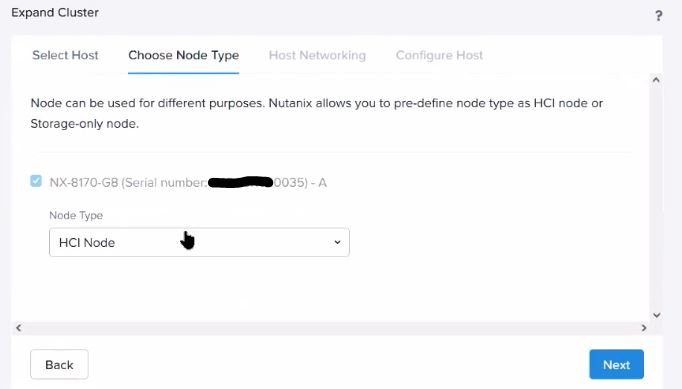
on the Choose Node Type and click on Next
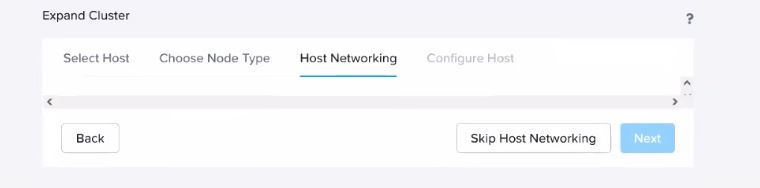
on the Host Networking, Since I have already confirmed my Node network, I will select skip Host Networking , click Next
on the Configure Host, click Expand cluster,(you may run checks beforehand just to confirm everything is ok)
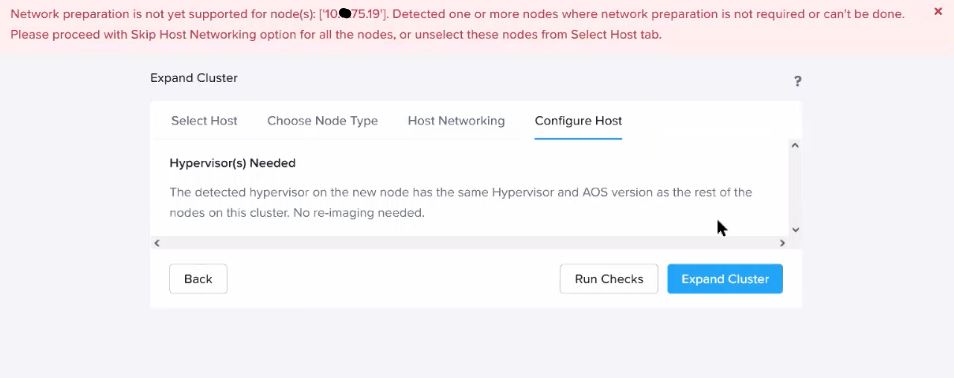
you can safely ignore the warning on top.
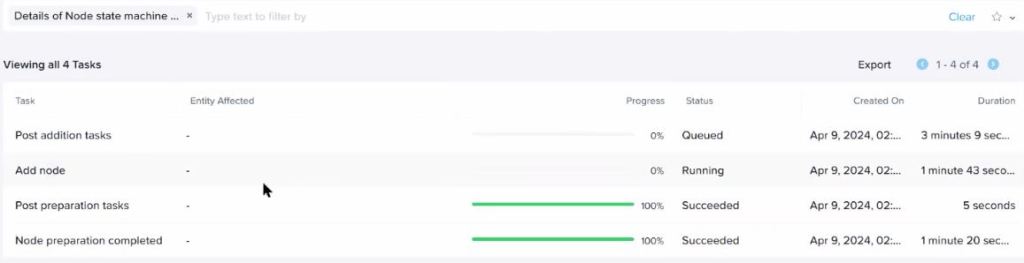
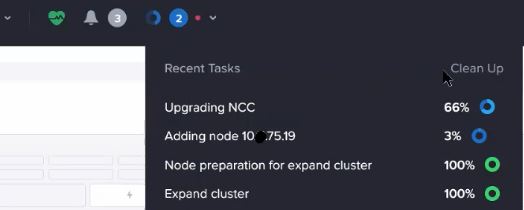
you will see expanding cluster, click on open

once the task is completed, go to Hardware tab and wait until the new node shows over there, or connect to any CVM in the cluster and run:
CVM# acli host.list
the new host should show here.
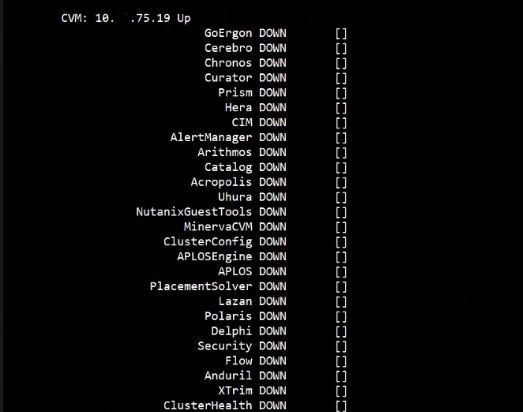
Now check the CVM services
CVM#cs | grep -v UP (if any services are down for any CVM it will show otherwise it will show UP in front of each CVM)
you need to wait a couple of minutes as it will take some time before all services come online.
Confirm the new node been added to Cassandra ring
CVM#nodetool -h 0 ring

as you can see, the new node will first enter the Limbo state and then becomes normal once it gets in sync with other nodes in the ring.
if you go back to Prism , you will see that cluster is syncing components on the node
That is all for the Cluster Expansion with a node and AHV as hypervisor.
Ahmad
