Veritas Flex does simplify the backup install/upgrade for administrators. In this post I will illustrate how to upgrade a Veritas Flex version, Firmware, and netbackup instances.
Preparation:
-check the appliance health:
login to flex appliance via ssh (user:hostadmin), run the health check command(s) to confirm there is no error or warning on Flex (software, Hardware, hard disk and etc.)
-reboot the appliance once: the uptime of the appliance should not be more than 120 hours
-have the Flex version, firmware (if required), instance version (if required), add-ons(if required).
Flex version upgrade:
first of all, you need to turn off the instances on the node, before starting the Flex version upgrade.
Make sure netbackup instances are offline prior to upgrade.
-login to flex appliance console (as Admin user), go to repository, add package in appliance updates (if you do not see add package, you need to remove any existing package first)

One you have uploaded the Flex, version(rpm format), click on update.
note: if you have access to physical appliance, do the upgrade from appliance console itself. (system upgrade) and it will ask you to enter the package name as confirmation.
the process will take about 2 to 3 hours or longer. During the process the appliance will restart.
Please note that you must not restart the appliance manually.
once the upgrade is finish, confirm the new version is showing in the console (or ssh) and do the commit.
if the upgrade failed, it should return you back to old version but in case it is stuck, I suggest you open a ticket with Veritas support and do not take any action yourself.

Flex Firmware upgrade: the procedure for Firmware upgrade is exactly like Flex version upgrade, again you need to go to appliance update tab and remove the existing package and add the firmware package.
during the firmwrae upgrade our instances needs to be off as well.
NetBackup Instance(s) upgrade:
once the firmware upgrade is over, if you did not upload the new NetBackup version to Applications repository, do that first and then follow the upgrade procedure as below:
– start all instances (right click on an instance and upgarde), upgrade procedure takes place just like normal netbackup environment, first Master and then Media server..

It will do a precheck test and if it is successful, select the version for upgrade and it is also recommended to suspend job scheduling:

click next and review your configuration and then click yes on upgrade message.
once the upgrade is finished, it will give you 24 hours to do the commit. Even though you have plenty of time for committing the change, I suggest you do the commit immediately.
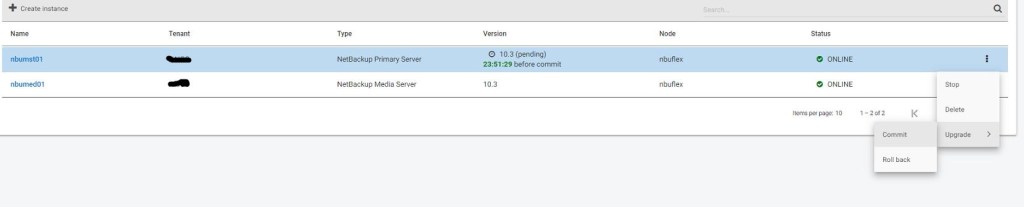
Once the master instance is upgraded, you can start the media instance(s) upgrade.
while the instance is running, right click on it and select upgrade, after precheck is successful click next
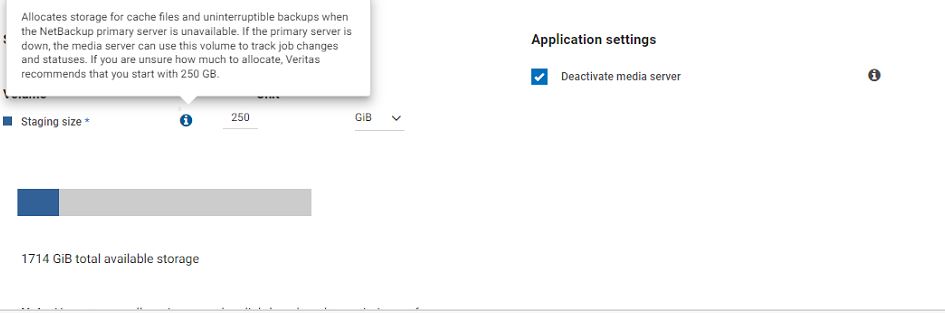
allocate a staging size as a temporary location. ( if you do not know how much, give 250 GB, ) select Deactivate media server. And click next and say yes to upgrade message. One the upgrade is done, commit the change for the instance.
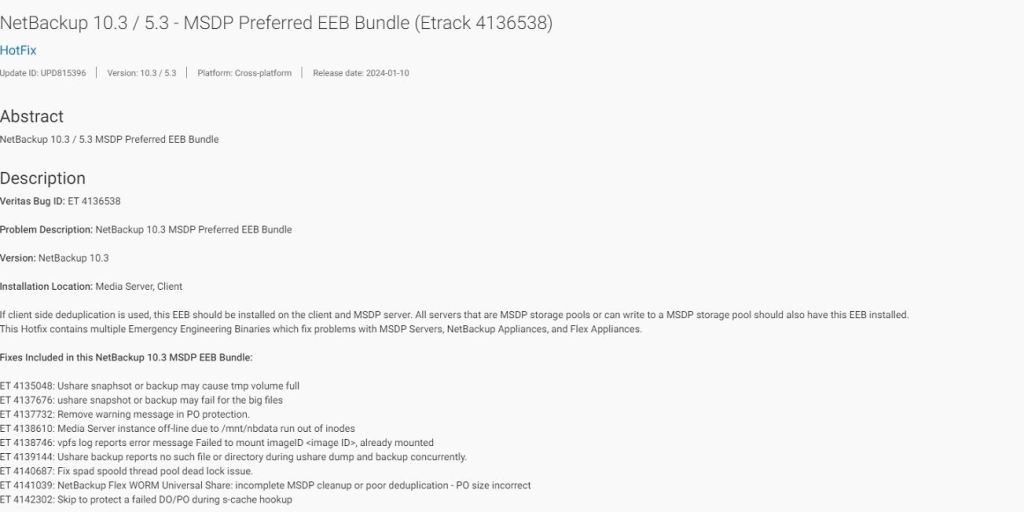
EEB bundles: last but not least, we will install if any EEB bundle (hot fixes) is required for the new instance version.
upload the EEB to Application add-ons and click on update:
All right, that was the procedure for Flex appliance version upgrade, I hope you enjoyed it.
