I have explained in my previous post on how to push Linux agent from Veeam server to your client. Unfortunately, sometimes you will not be able to push agent to your Linux / Unix servers, which then you need to install the agent manually on your client.
In my lab environment, I have:
-Veeam backup & replication (VBR) 11
– A fresh Debian VM (with minimum software installed on it)
if you do have a UNIX server, which should be supported by Veeam, you can follow the same procedure to install Veeam agent in your client.
Agent installation:
Connect to your VBR console and create a new protection group by accessing, Inventory and right click on Physical Infrastructure and selecting New Protection Group
in the name, provide a name for your new protection group and click next.
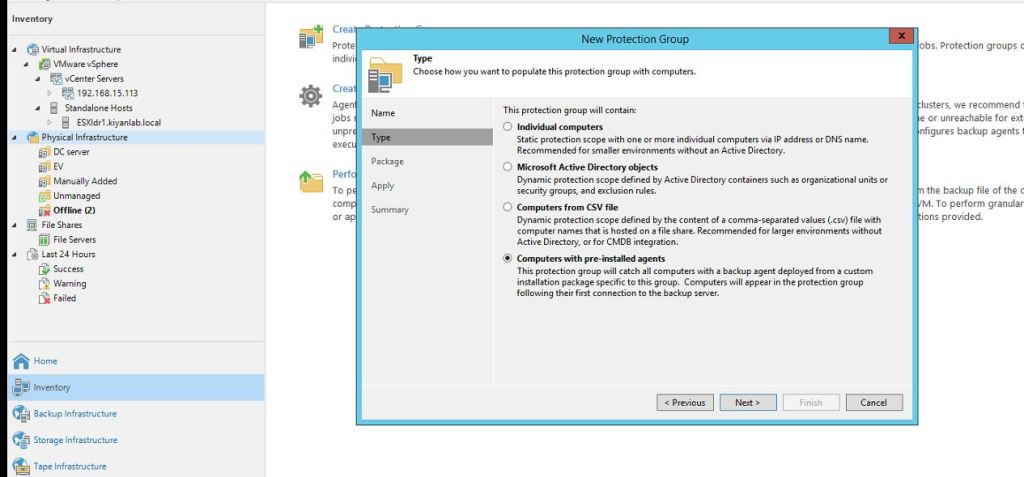
In type, select the last option “Computers with pre-installed agents”
In export path, provide a path for exporting agents and select your desired package or all of them if you do not have problem with agents size on your local disk
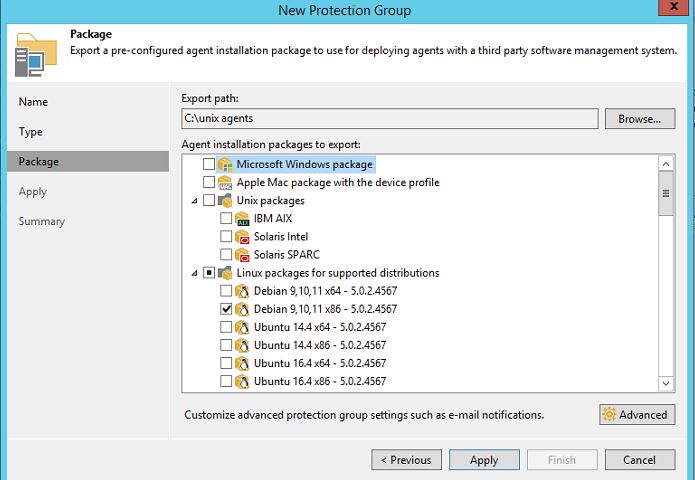
in the advanced option, you can modify advanced settings as shown in below

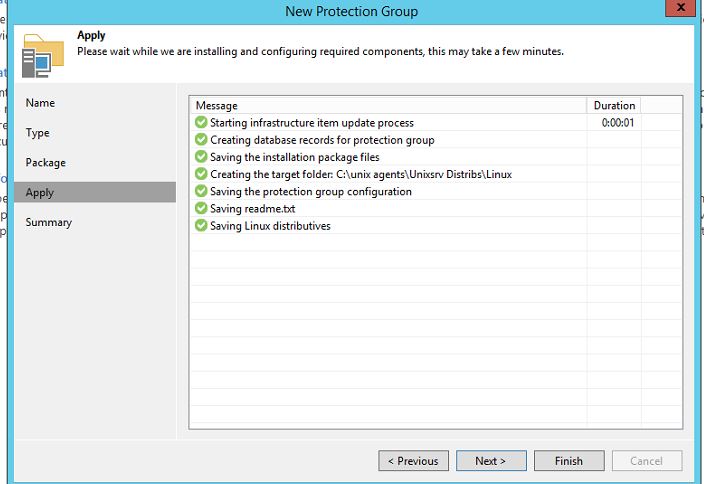
click next, which will install the required configuration and configuration and export the agents to your mentioned location in local disk.
Click next and then finish
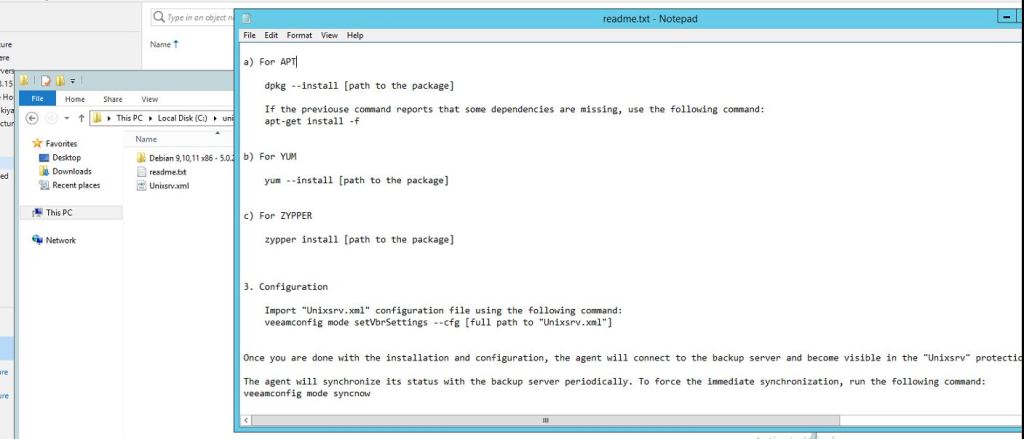
by accessing the location where our agent been extracted, we will be provided with the agent package, an XML file and a README file.
If you open the README file, you will be provided with all steps required to install the agent in your client
Please note that your steps could be slightly different from mine as you cloud have a different client
Copy the agent file and XML file to your client by your desired tool (example: Winscp).
Login to your client and change your directory to the directory where you have pasted the files from last step.
#cd /tmp
I have tried to install the agent using the provided command in README file:
#dpkg –install <package name>,
Unfortunately, due to missing dependencies, the installation was not successful
you can ignore below step, if you were able to install the agent on your client by following provided command

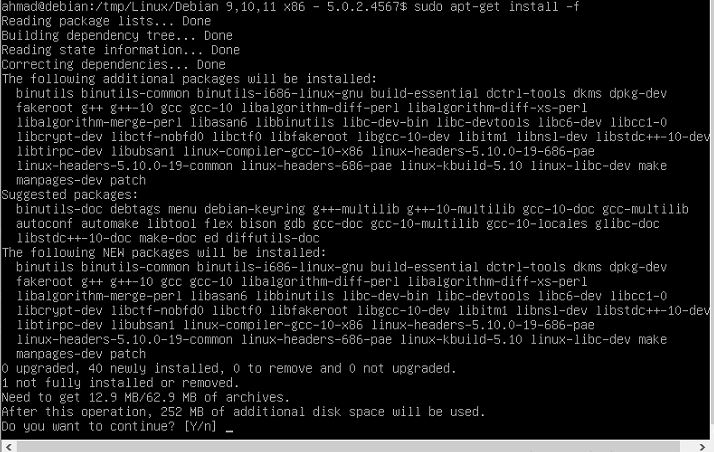
After running the below command: (the OS media is connected and mounted in my client)
#apt-get install -f
all required dependencies are installed in our client
After fixing the dependencies issue, I run the agent installation command again:
#dpkg –install <agent-package-name>
our agent gets installed successfully in the client!
After installing the agent, we need to install the XML file using below command:
#veeamconfig mode setvbrsettings –cfg <XMLfile>

The registration depends on environment, could take a few seconds or a couple of minutes.
Once the registration is finished successfully, we will access our VBR console and add the new showing client to a new job.
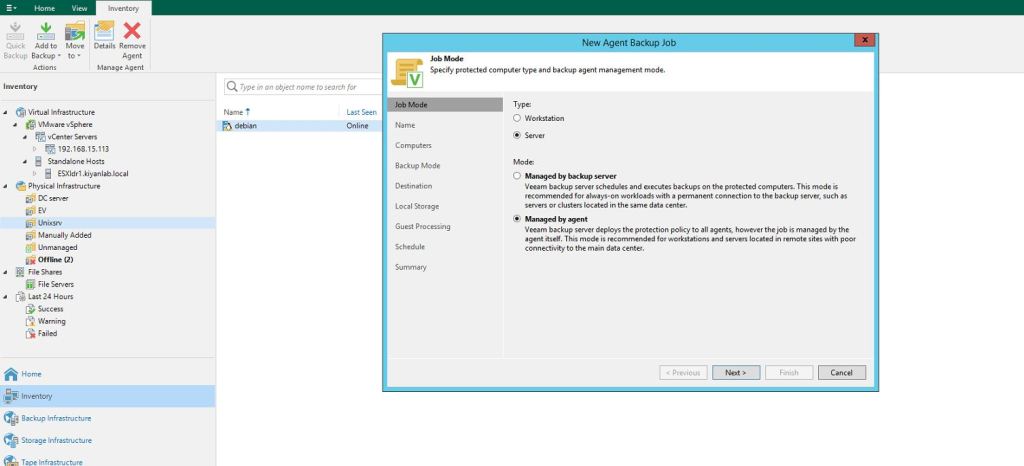
In job Mode, select Server and managed by agent, click Next.
In Name , provide a Name for your new job click Next.
In Computers, confirm the client is added and click Next.
In Backup Mode, select your desired option, click Next.
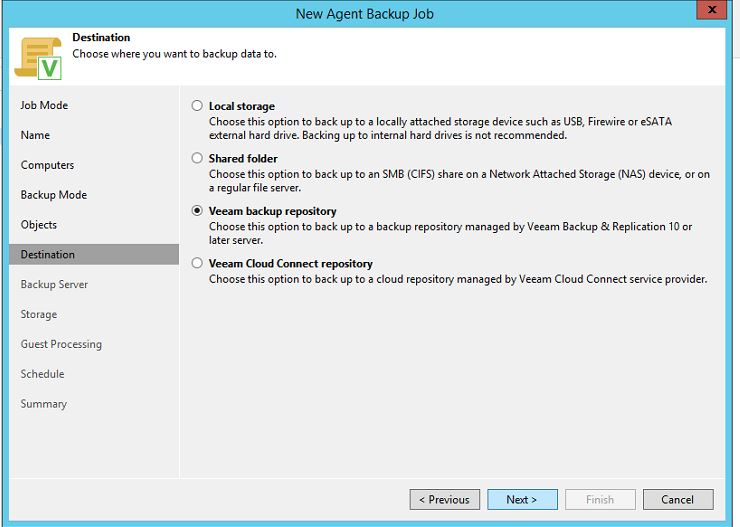
Destination, select Veeam Backup repository and click Next.
In backup Server, select your desired VBR server FQDN click Next
In Storage, select your desired Storage and number of restore points and click Next
In Guest processing, select the desire option if needed (Script can be added here).
Provide Schedule and click next to create the job.
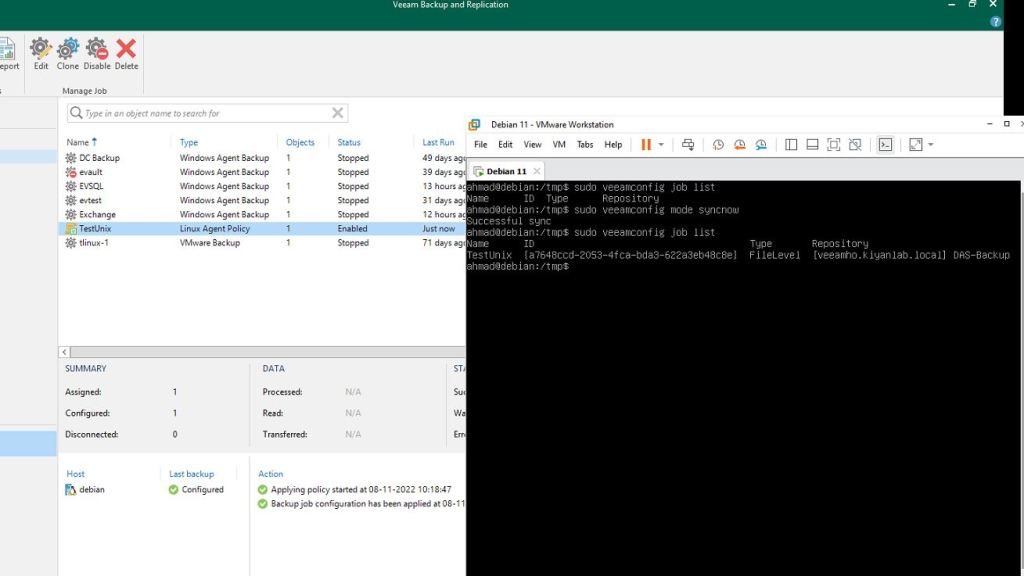
If we get back to client console, we need to confirm the backup job which we just created is visible in there, using the below command:
#veeamconfig job list
and if no job is listed, force a sync between client and VBR using below command
#veeamconfig mode syncnow
we can run the job now from our client using one of below commands:
#veeamconfig job start –name <Name of job>
or
#veeamconfig job start –id <Job ID>
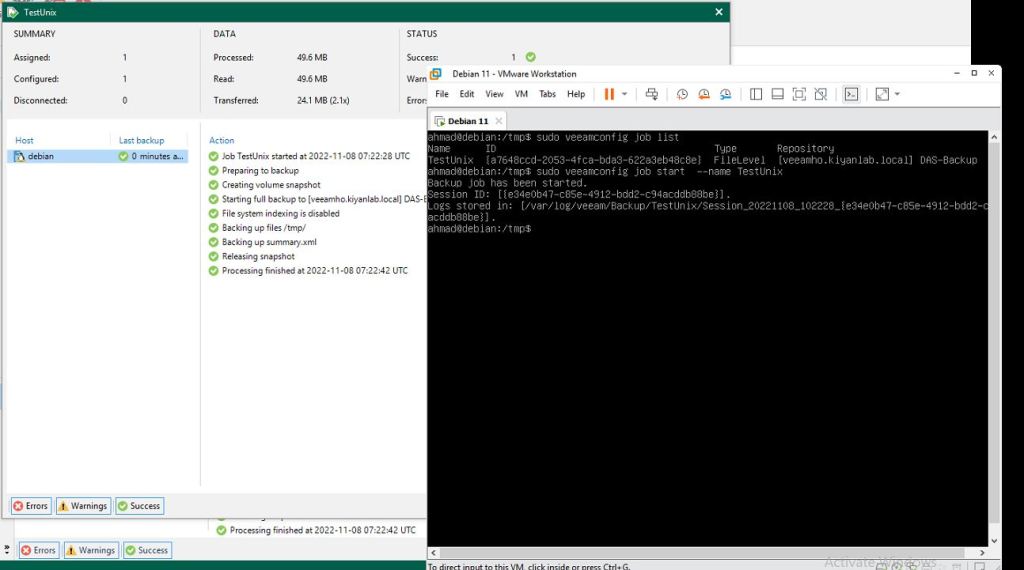
As you can see in the above image, the job finished successfully.
Ahmad
