I have been recently introduced with Nutanix.As I always like to experience a new technology with my own bare hands ,I have tried to build a lab in my home to better know the product and its features.
LAB Hardware
for my lab,as I like to built a cluster of three nodes, I have two physical devices:
-Dell T41 with 128 GB memory ( I will install two nodes on this endpoint)
-HP Zbook 15 with 32 GB memory
Please note that In case you want to install Nutanix CE on one Device, the process will be exactly the same except the part for cluster creation as you will create the cluster on one node only.
LAB preparation:
I have windows installed on both of my devices with VMware workstation v16 on top of them. both physical devices will communicate to each other via a wireless router.
I have enabled Intel virtualization in bios for both of my physical devices.
Lab IP topology:
I have 192.168.8.0 /24 in my home subnet and will connect my nodes via bridge.
we will need two IP address for each Nutanix CE node, so if you are doing a cluster on a n node , you will need n x2 IP Addresses. one IP address will be used for Acropolis OS (AOS) and another one for Nutanix Controller VM (CVM),so my lab IPs are as below:
mine are as below :
NodeA AOS:192.168.8.20
NodeA CVM:192.168.8.21
NodeB AOS:192.168.8.30
NodeB CVM:192.168.8.31
NodeC AOS:192.168.8.40
NodeC CVM:192.168.8.41
Nutanix CE ISO download:
for this lab , I am using CE-2020-09-16.iso and prism central (same version) which you can download from here .
once you logged in above link , it will ask you to register and then you can download the Nutanix CE and Prism central to your Device.
As I have mentioned earlier , I have created three nodes (two on one host and one on different physical server) in my home Lab.
in VMware Workstation,create a new VM,provide 24 GB memory to the node and 4 core CPUs(enable virtualize Intel VT-X option for CPU),I have selected 4 cores
(tip:if you want to install the Prism central , you need to have at least 6 cores in your host)
you will need to add 3 HDD to each node :
boot HDD:20 GB ( you can keep it 6 GB and above) keep the location on SSD HDD
Hot Tire:300 GB (minimum 300 GB) keep it on a SSD HDD
cold Tire:500 GB (keep it on a normal HDD or if you have free space on your SSD)
make sure that you are adding all HDDs in VM as SATA.

LAB Installation:
Now that We have prepared our Nodes, Lets Start the installation:
Mount the Nutanix CE to the newly created VM and start the VM,it will automatically boot from the media,depends on your hardware within a couple of minutes or more you will be presented with below screen
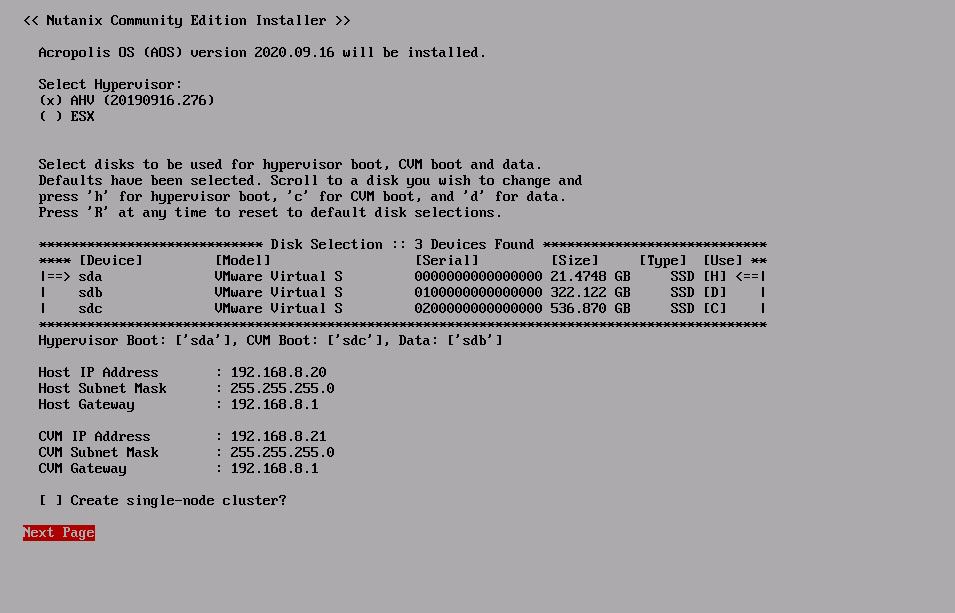
Select AHV from the hypervisor and modify the IP Address for AOS and CVM, do not select the create Single-node cluster as we will create our cluster later on.
click next
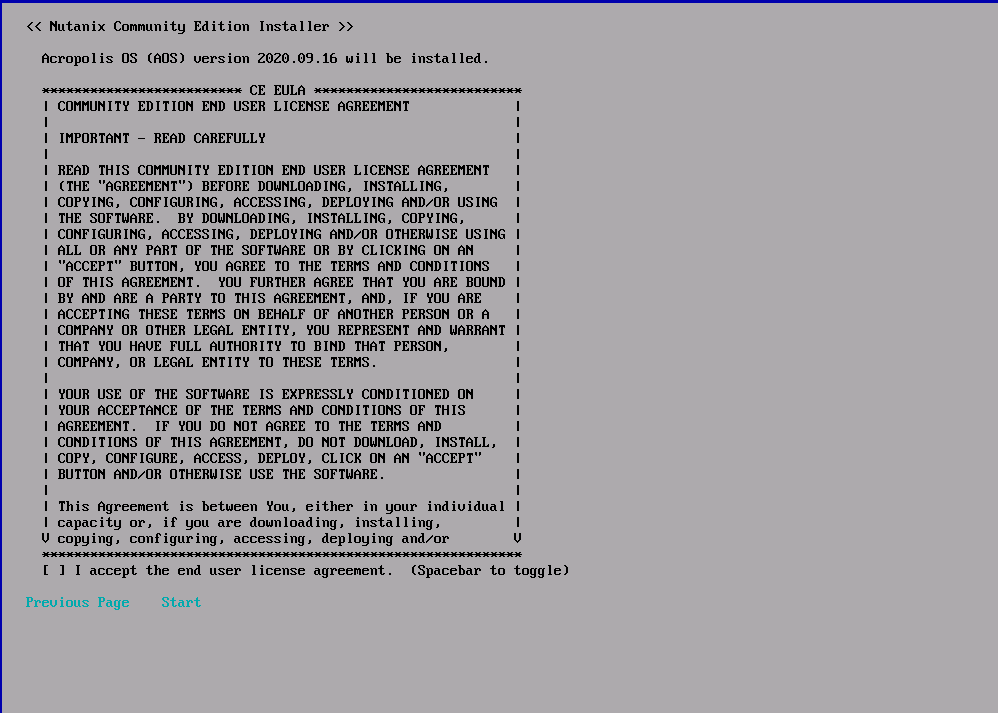
scroll down to read the license agreement and once you reach the end, click on I accept and Start
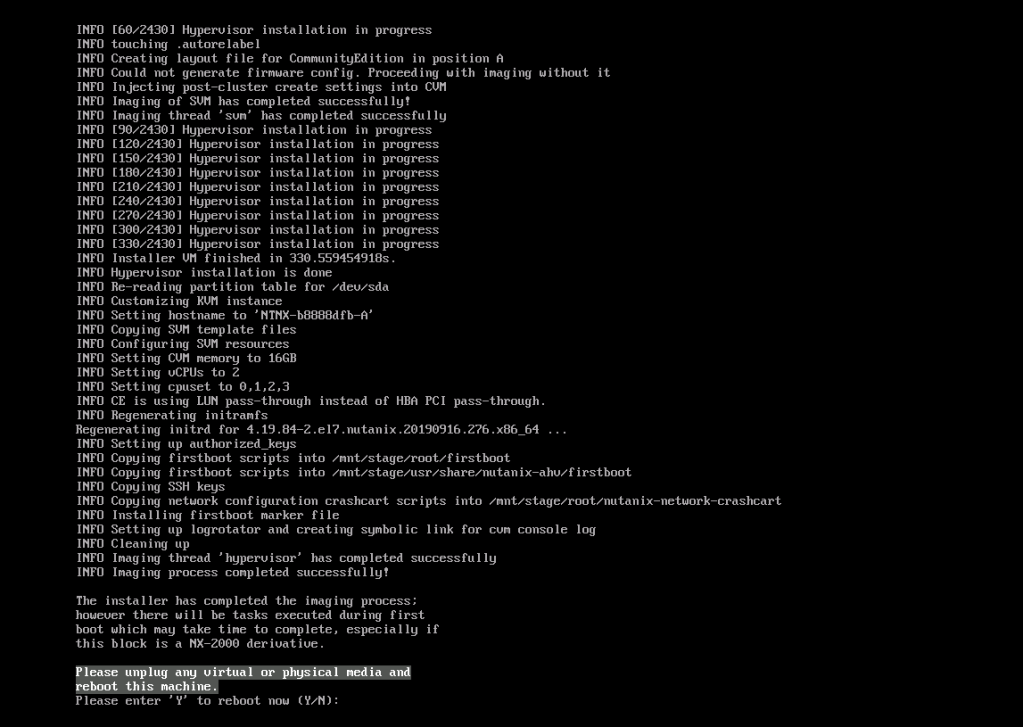
once the installation is finish,it will ask you to remove the boot media from the virtual machine and reboot the VM.
once you reboot, you will be able to login to the AOS via default credentials:
username:root
password:nutanix/4u
so far we have installed our AHV (AOS and CVM)now to create a cluster, we need to connect to CVM via ssh (IP Address which was provided during installation)and run our cluster creation command.
CVM default credentials:
username:nutanix
password:nutanix/4u
Nutanix one node cluster creation
remember that , you need to run all below commands from CVM and not AOS!
if you have one node and you would like to create a cluster with one node in it:
nutanix@cvm$ cluster -s cvm_ip --redundancy_factor=1 create
replace the cvm_IP with your CVM IP address and press enter, it supposed to provided you with the cluster created message(cluster success!) at the end.You can add dns server to your cluster (optional)
nutanix@cvm$ ncli cluster add-to-name-servers servers="dns_server"
just replace the dns_server with your DNS IP Address .
to create a multi node cluster (three nodes), we will do as below:
-connect to one of CVM’s via SSH and make sure , you can ping other nodes CVM’s ip address from within logged in CVM.
nutanix@cvm$ cluster -s 192.168.8.21,192.168.8.31,192.168.8.41 create
for some reason,I was not able to create the cluster and I have received the error“Could not discover all nodes specified. Please make sure that the SVMs from which you wish to create the cluster are not already part of another cluster” .since there was ping and connectivity between all three nodes I have used below command:
nutanix@cvm$ cluster -s 192.168.8.21,192.168.8.31,192.168.8.41 --skip_discovery create
once I had my cluster created successfully, I have changed the name of the cluster
ncli cluster edit-params new-name=kiyanlab
then I have assigned an IP Address to cluster
ncli cluster set-external-ip-address external-ip-address="192.168.8.50"
simple type the cluster IP address in browser and it should redirect you to :
https://clusterIPAddress:9440/console/#login
default credentials:
username:admin
password:nutanix/4u
you will be asked to change the password upon your first login.
from top,left side ,select storage , we will be presented with list of our storage containers:
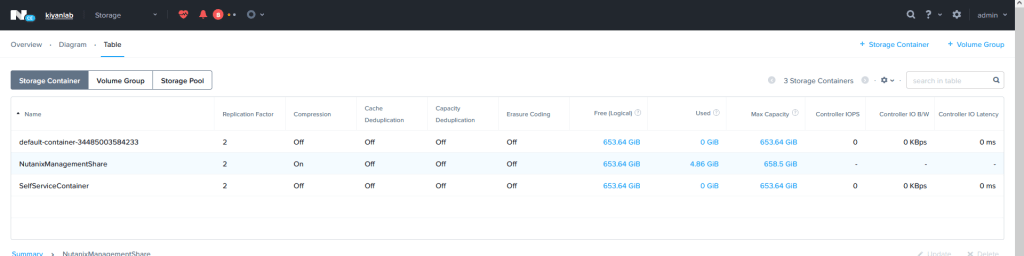
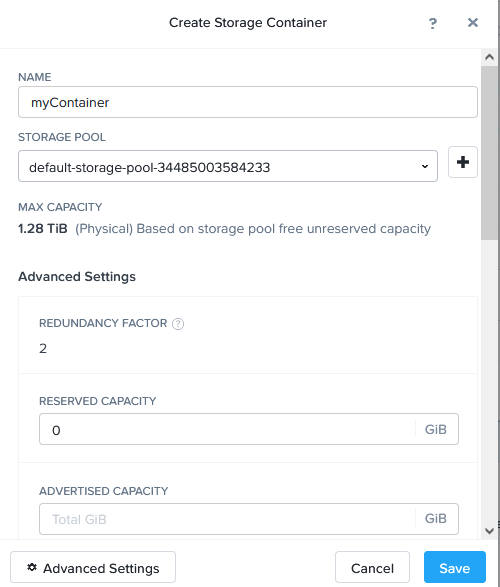
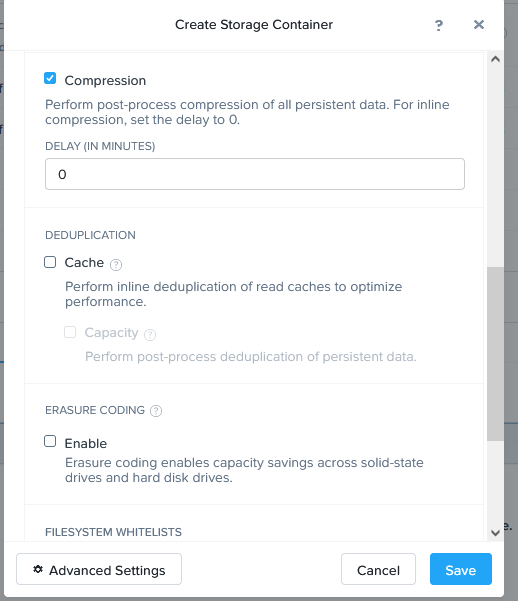
out of three,we will delete the storage container which starts with “default container”and then from right corner we will create a new storage container and provide it with our name , I have kept the configuration as default
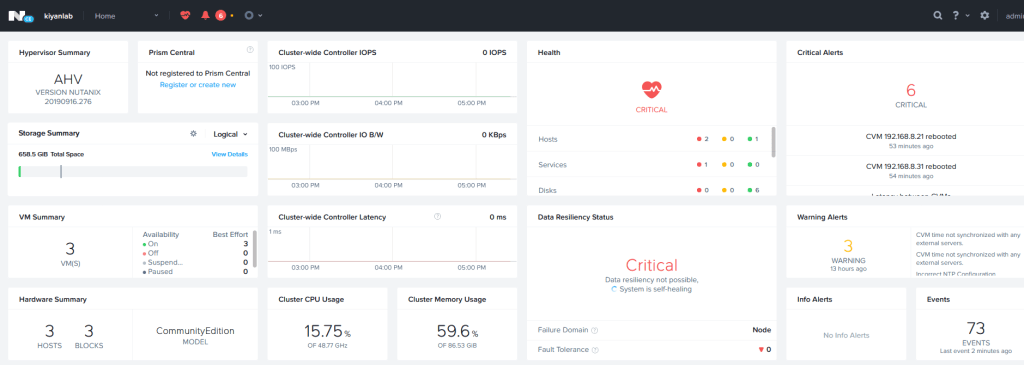
Now that is all , we have done with cluster creation.
in the following post ,we will install the Prism Central in our cluster and then add it to prism Element.
